If you’re submitting building plans to a municipality — whether you’re an architect, a draughtsperson, or a contractor managing the process yourself — there are two reference numbers you need to understand. Confusing them is an easy mistake to make, and it causes unnecessary delays and headaches. So let’s clear it up once and for all.
What Is an Erf Number?
An erf number is the number assigned to a piece of land. It’s a fixed, cadastral reference — it describes the property itself, not anything built on it. Whether there’s one building on the site or ten, the erf number stays the same. It’s how the municipality, the Deeds Office, and your title deed identify the land.
What Is a Plan Number?
A plan number is different. It’s the reference number assigned by the municipality to a specific building plans submission. You submit a set of plans; the municipality gives that submission a plan number. It’s their tracking reference for that particular application.
Here’s the key point: one erf can have more than one plan number.
If there are multiple buildings on a site, each building’s plans get submitted separately — and each submission gets its own plan number. If you submit revised or amended drawings, that’s a new submission, and it gets a new plan number. The plan number is tied to the submission, not the land.
Why Does This Matter?
The confusion usually arises when people are working on a site with multiple structures, or when they’re resubmitting amended drawings. It’s tempting to think: same site, same number. But that’s not how it works.
Using the wrong plan number — or reusing an old one — can cause one submission to overwrite another in the municipal system. That’s a problem that’s difficult and time-consuming to unwind.
A Simple Rule to Remember
Erf number = the land. Fixed. Doesn’t change.
Plan number = a specific submission. One erf, many possible plan numbers.
If you’re unsure how to handle a particular submission — especially on a larger or more complex site — ask. It’s far easier to get it right upfront than to chase a correction through the municipal system afterwards.
This applies primarily to Nelson Mandela Bay Municipality, where we work, but the principle is consistent across most South African municipalities. The terminology may vary slightly, but the distinction between a land reference and a submission reference is universal.
I get asked this regularly — and I understand why. The terminology in architecture and town planning is genuinely confusing. What is a site development plan? How is it different from a building plan? How is it different from a concept plan? Let me explain.
What a Site Development Plan Actually Is
A site development plan — or SDP — is a planning tool. It is the device we use to test whether a parcel of land can carry what a developer wants to put on it. A shopping centre. A block of flats. A hotel. A mixed-use development. Before you spend money on a full architectural design and a detailed municipal building submission, the SDP allows you to check the fundamentals with the municipality, with a degree of certainty, at a relatively early stage of the process.
Think of it as the planning equivalent of a feasibility study — but with teeth. It’s a formal submission. It has legal standing. And it can give a developer the confidence to say: yes, go. Or it can stop a project in its tracks before anyone has spent serious money.
Where the Definition Comes From
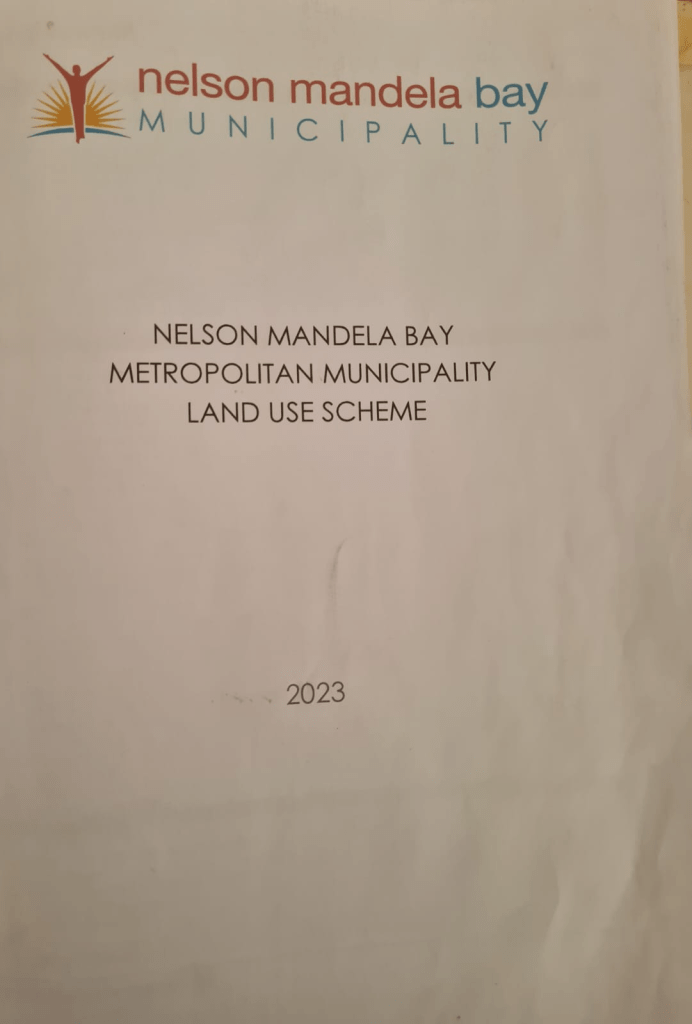
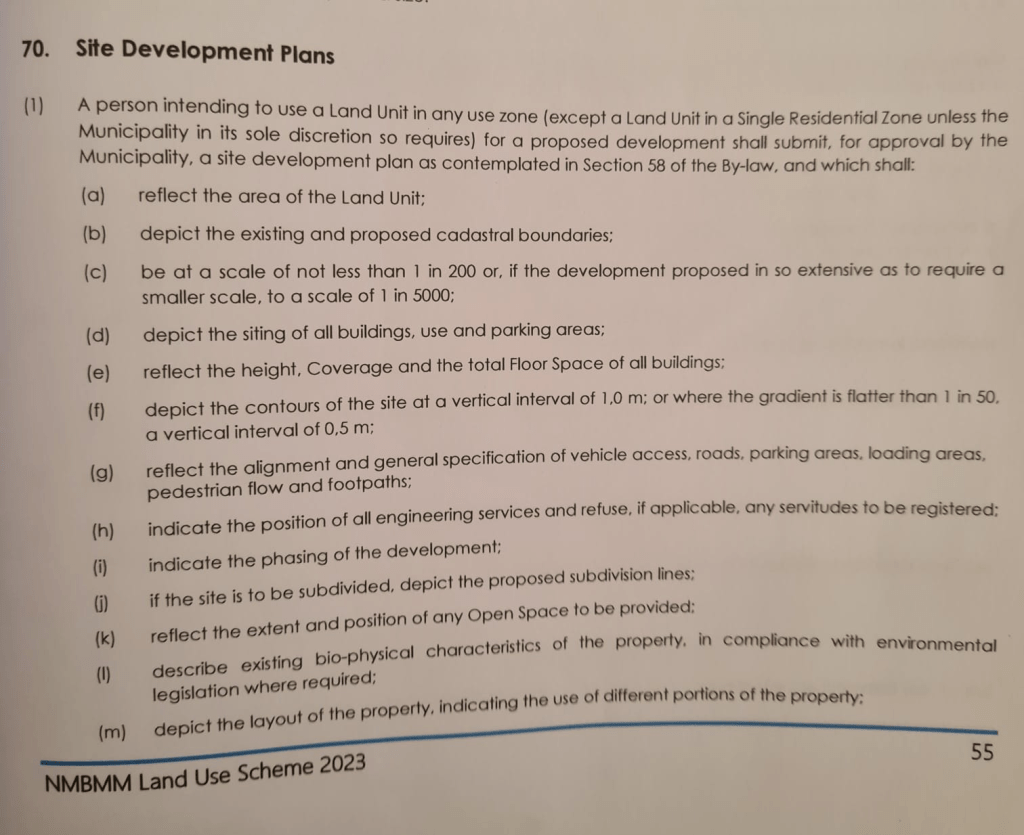
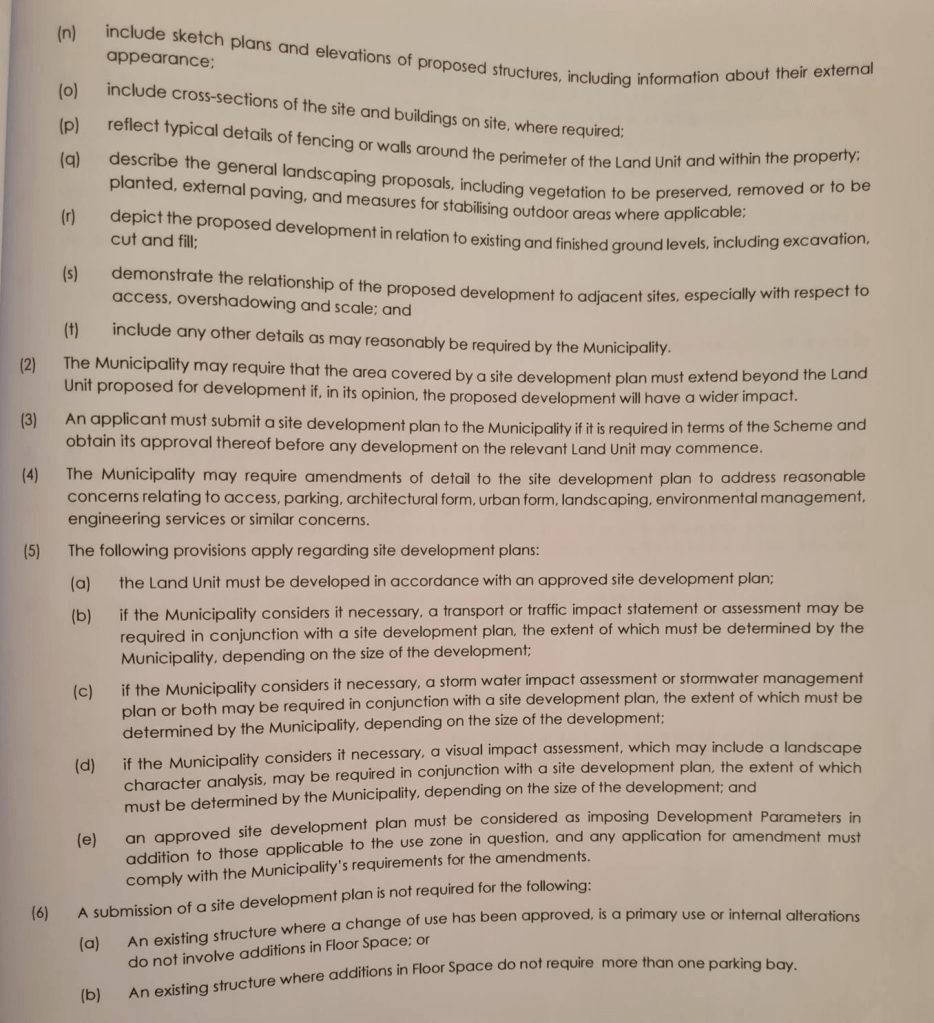
Don’t take my word for what a site development plan is. Go to the source. In Nelson Mandela Bay — and for most of the Eastern Cape — the authoritative document is the Nelson Mandela Bay Metropolitan Land Use Scheme of 2023. That is the zoning scheme. It defines the SDP, it sets out what must be included, and it tells you the scale, the required information, the supporting documentation, and the process.
If you’re working in another municipality, find your local zoning scheme. The definition will be there.
In the Nelson Mandela Bay scheme, the SDP definition appears at item 70, on page 55. Worth bookmarking.
What Goes Into a Site Development Plan
The SDP is not a full set of construction drawings. That’s the point. It is a drawing set that shows the land unit — the erf or erven — along with contours, proposed building footprints, parking layouts, access points, subdivisions where relevant, and other site-level information specified by the scheme. You are showing that the development concept fits on the land, complies with the applicable land use rights, and can accommodate the practical requirements of the site.
It saves you from the full effort of SANS 10400 compliance, drainage calculations, toilet schedules, and all the technical detail of a building plan submission — at least at this stage. That comes later. First, you establish that the concept is viable and approvable.
The Walking Sheet Process
Once you’ve compiled the SDP, you take it to the municipality’s planning department. They will issue you with a checklist and a document that we call a “walking sheet.” That walking sheet is your route map through the municipal system. You take your SDP drawings and your walking sheet to the fire department, to roads and storm water, to waste management — each relevant division of the metro. Each one reviews the proposal and signs off.
When all the signatures are in place, the municipality has confirmed that the proposed development is acceptable to each of those departments. That’s a significant thing. It means the developer has a green light — in principle — to proceed. A hundred two-bedroom units. Five thousand square metres of retail. The parking works. The storm water can be accommodated. Go.
Don’t Underestimate It
A word of caution: do not dismiss the SDP as a minor administrative step. It is not “just” a site development plan. It is a substantive piece of professional work. It requires careful analysis of the land use scheme, accurate site information, and a thorough understanding of the development proposal. Getting it wrong — or submitting something incomplete — costs time and money.
Done well, it gives a developer enormous confidence. Done poorly, it creates delay, uncertainty, and in some cases derails projects that could have been salvageable.
— Tim Hewitt-Coleman
If you are a developer, an investor, or someone sitting on a piece of land wondering whether your idea is viable — get an SDP done before you go further. It is the right tool for that question.
If you’re curious about building in timber, you’ve probably already run into someone at a braai who told you it can’t be done, won’t last, and no bank will touch it. Let me address that directly — and then tell you why timber is one of the most underutilised and underappreciated options in South African construction.
The Questions People Ask Me
Can I get a bond on a timber house?
Yes. ABSA certainly provides bonds. One or two other institutions require an extra hoop or two, but finance is available. We’ve helped clients through the application process — it’s not the obstacle people imagine it to be.
Can I get insurance?
Yes, without difficulty. This is not a problem.
Can I get municipal approval?
Yes. Timber construction must comply with the same regulations as conventional brick construction — the National Building Regulations apply equally — but approval is entirely achievable. Approved drawings, engineering sign-off, all of it. Formal, not informal.
Is it cheaper?
Not necessarily — and that’s not really the point. Cost depends heavily on your finishes, your fittings, your taps. Timber construction won’t be more expensive than brick, and it could well be cheaper, but if that’s your primary motivation you may be missing the more compelling reasons.
Is it faster to build?
Yes, significantly. The potential for off-site pre-manufacture means that components can be prepared in a workshop or at a supplier and assembled on site quickly and efficiently, often with nothing more than hand tools and a battery drill.
Is it better for the environment?
Clearly. Timber has a fraction of the embodied energy of brick, concrete, or steel — all of which require enormous amounts of heat and energy to manufacture. Beyond carbon, timber construction has a far lighter footprint on sensitive sites. No heavy concrete mixers, no constant brick deliveries, minimal ground disturbance. On environmentally sensitive sites, this matters enormously.
Is it DIY-friendly?
Very much so. The tools and skills required to build in timber are widely available — on YouTube, at your local hardware warehouse, from experienced tradespeople. If you want to get your own hands involved in the process, timber gives you far more opportunity to do that than conventional construction.
Timber Is Not Foreign to Construction — It’s Already Everywhere
One thing I want to clear up: timber construction is not some exotic alternative to conventional building. It’s already all around you. Roof trusses are timber. Louvre screens are timber. Flooring is timber. Joinery, cupboards, kitchen fittings — timber is ubiquitous in conventional construction. Our industry already knows how to work with it. The skills are there. The materials are there. Very good quality timber in all the varieties you’d need is available in the South African market.
What I’m advocating for is taking that further — walls, floors, and structure all in timber — and doing so formally, with approved plans, engineering, insurance and finance in place.
In the United States and Canada, this is simply how houses are built. Brick construction there is the exception rather than the rule, because timber offers efficiencies that brick simply cannot match. We haven’t fully made that shift in South Africa, but there’s no reason we shouldn’t.
Where Timber Really Comes Into Its Own
Two situations stand out.
The first is remote construction. I’ve worked on projects in deeply remote locations — including work we did on the Baviaanskloof Letterbosch Trail, half an hour’s drive from the nearest gravel road, in rugged terrain that would make conventional construction a logistical nightmare. Pre-manufactured timber panels and components, assembled on site with light hand tools. That project went through full municipal approval, and was subject to the conditions of an Environmental Impact Assessment, as it sits within a World Heritage Site. It can be done — formally, rigorously, beautifully. Those projects won awards from the South African Institute of Architects. I’m proud of that.
The second is DIY self-build. At Pebble Spring Farm, where I live, my daughter and I built a small timber structure in the forest — primarily ourselves, with simple technology. The foundations are 400x400mm concrete pier pads, available from any nursery, set in pits that anyone can dig. Treated poles, tech screws, engineered and signed off. Floor structure of 150x50mm beams on a 228x50mm undercarriage. Simple, low-technology, and completely replicable by anyone willing to learn. This particular structure is designed to be loaded onto a car trailer and moved — something you will never achieve with brick or concrete.
The vision for that project is a cluster of similar units at Pebble Spring Farm, available as Airbnb accommodation. Off-grid, light in the environment, beautiful in the forest.
A Balanced Approach
I wouldn’t suggest you become a timber fanatic and refuse to use anything else. Like a good diet, a balanced approach is usually right. Timber works brilliantly in combination with conventional materials — and the appropriate response depends on your project, your site, your budget, and your objectives.
What I am saying is this: don’t dismiss timber because of received wisdom or a sceptical uncle. The finance is available. The approvals are achievable. The skills and materials are in the market. The environmental case is strong. And the quality of space that timber creates — warm, tactile, quiet, and somehow emotionally at ease in its surroundings — is genuinely hard to replicate in brick and concrete.
Yes, you can do it. And it might be the best building decision you ever make.
One of the things I enjoy about being an architect is that no two days are the same. Today I’m helping a client get building compliance on an older property in Mossel Bay — and it’s a good reminder of some important lessons when working with historic drawings.
Here’s what to watch out for.
Old Approved Plans Are a Starting Point, Not a Source of Truth
When you’re working on an older building, you’ll often be handed a set of plans that were approved many years ago. In this case, we’re looking at drawings from 1963. They have a municipal stamp on them. They look official.
Don’t trust them — at least not without verification.
That stamp tells you the drawings were approved at the time. It doesn’t tell you whether the dimensions are accurate, whether the work was built as drawn, or whether the person who drafted them measured correctly. You can and should look at old approved plans to understand what was built and what was approved, but treat every dimension as something to be verified independently.
The Cape Feet Problem
South Africa adopted the metric system in 1961, but surveyors and draughtsmen were still working in the old system well into the 1960s. That means you’ll often encounter drawings dimensioned in Cape feet — not imperial feet, but Cape feet, which are a slightly different measurement again.
A dimension that reads “80” on a 1963 drawing could mean 80 Cape feet, which converts to approximately 25.1 metres. That’s very different from 26 metres — yet 26 metres is what the stamped municipal drawing claimed.
To convert Cape feet to metres reliably, use an online conversion tool. I’ve found convertunits.com to be accurate for this purpose. Type in your Cape feet value, convert, and then cross-check against independent sources before you rely on the figure.
How to Cross-Check: The SG Diagram and the GIS
For any property, there are two authoritative sources of site information:
The first is the Surveyor General’s diagram. This is the legally registered cadastral diagram for the erf, held by the Chief Surveyor General’s office (sg.drdlr.gov.za). In our Mossel Bay example, the SG diagram is dated 1952 — older than the approved plans — but it’s the legal record of the property boundaries and is the document you should trust.
The second is the municipal GIS. Most municipalities now offer publicly accessible GIS portals with measurement tools. You can measure boundary dimensions directly on screen and compare them to what appears on your drawings. In this case, the GIS measurement confirmed 25.1 metres — matching the SG diagram and the converted Cape feet figure, not the 26 metres on the approved plans.
That discrepancy of nearly a metre may sound minor. It isn’t. If you build in the wrong position based on incorrect boundary information, you could end up over a sewer line, over a boundary, or in a situation that costs your client enormous amounts of money to rectify.
The Principle
When working on older buildings, the rule is simple: the Surveyor General’s diagram is the authoritative record of the property. Everything else — old approved plans, municipal stamps, previous survey pegs — needs to be cross-checked against it before you rely on it for design or construction.
Take the time to verify. It’s not complicated, and it could save your client — and your professional indemnity — a great deal of trouble.
Architectural Review Panels: What Every Architect Should Know
One of the quiet pleasures of being an architect is the variety. One day you’re deep in a complex commercial project, the next you’re reviewing someone’s house extension against a set of estate guidelines. It keeps you sharp — and it keeps you honest.
From time to time, you’ll be asked to serve on an architectural review panel for an estate or sectional title development. It’s not glamorous work, and it won’t make you rich. But it matters. Someone has to hold the line on quality, and if you do it well, you protect both the built environment and your own professional reputation.
Here’s what I’ve learned.
Set Up Clear Terms of Engagement — Before You Start
Before you accept the appointment, nail down how you’ll receive submissions. Insist on a single point of contact — one named person — and specify that all applications must come via email. If you don’t do this, you will be buried. Homeowners, builders, plumbers, interior decorators — everyone will try to contact you directly, and everyone will think their job is urgent. A clear channel protects your time and ensures there’s a paper trail for every submission.
While you’re at it, specify your turnaround time upfront. Ten working days from receipt of a complete submission is reasonable. Without a defined timeline, applicants will chase you the moment they’ve sent something. Define “complete submission” too — if drawings are missing or don’t meet the format requirements, the clock doesn’t start until they do.
Know the Guidelines and Stay Inside Them
Your role on a review panel is to apply the architectural guidelines, not to express your personal taste. This is a harder discipline than it sounds. You’ll look at a drawing and instinctively think “I wouldn’t do it that way” — but that’s not the question. The question is: does it comply with the guidelines or not?
The moment you start substituting your own judgement for the guidelines, you’ve stepped outside your mandate. You’ve also opened yourself up to disputes that are very difficult to defend, because your reasoning becomes subjective.
If the guidelines were written by someone else, read them carefully before accepting the appointment. If they’re vague or incomplete, flag it — and consider making amendments a condition of your acceptance.
If you’re writing the guidelines yourself, be precise. Specify exactly what drawings are required for a submission: site plan, floor plans, all four elevations, materials schedule. Specify the format — A1 printed, or A3 PDF. The more specific you are upfront, the fewer arguments you’ll have later.
Use a Structured Review Template
When you sit down to review a set of drawings, don’t write discursive comments. Set up a simple table:
Column 1: The relevant clause in the architectural guidelines
Column 2: Your comment
Column 3: Finding — In Order / Not In Order
That’s it. Work through the guidelines systematically, point by point. Your responses are factual, not emotional. People have significant money invested in these applications, and they have timelines. When a finding goes against them, they need to understand exactly why — and they need to be able to address it specifically and resubmit.
A structured template also protects you. If someone later claims you approved something that doesn’t comply, the record speaks for itself.
In Summary
Architectural review work is a small but important part of the profession. Done well, it upholds standards, gives homeowners confidence in their investment, and keeps estates from becoming an architectural free-for-all. Done badly — or without clear terms — it becomes a source of conflict that no one needs.
Be specific. Be systematic. Stay in your lane. And make sure the paperwork is tight from day one.

 noh ARCHITECTS